Codex CLI(ਨਵੀਂ ਵਿੰਡੋ ਵਿੱਚ ਖੁੱਲ੍ਹਦਾ ਹੈ) is our cross-platform local software agent, designed to produce high-quality, reliable software changes while operating safely and efficiently on your machine. We’ve learned a tremendous amount about how to build a world-class software agent since we first launched the CLI in April. To unpack those insights, this is the first post in an ongoing series where we’ll explore various aspects of how Codex works, as well as hard-earned lessons. (For an even more granular view on how the Codex CLI is built, check out our open source repository at https://github.com/openai/codex(ਨਵੀਂ ਵਿੰਡੋ ਵਿੱਚ ਖੁੱਲ੍ਹਦਾ ਹੈ). Many of the finer details of our design decisions are memorialized in GitHub issues and pull requests if you’d like to learn more.)
To kick off, we’ll focus on the agent loop, which is the core logic in Codex CLI that is responsible for orchestrating the interaction between the user, the model, and the tools the model invokes to perform meaningful software work. We hope this post gives you a good view into the role our agent (or “harness”) plays in making use of an LLM.
Before we dive in, a quick note on terminology: at OpenAI, “Codex” encompasses a suite of software agent offerings, including Codex CLI, Codex Cloud, and the Codex VS Code extension. This post focuses on the Codex harness, which provides the core agent loop and execution logic that underlies all Codex experiences and is surfaced through the Codex CLI. For ease here, we’ll use the terms “Codex” and “Codex CLI” interchangeably.
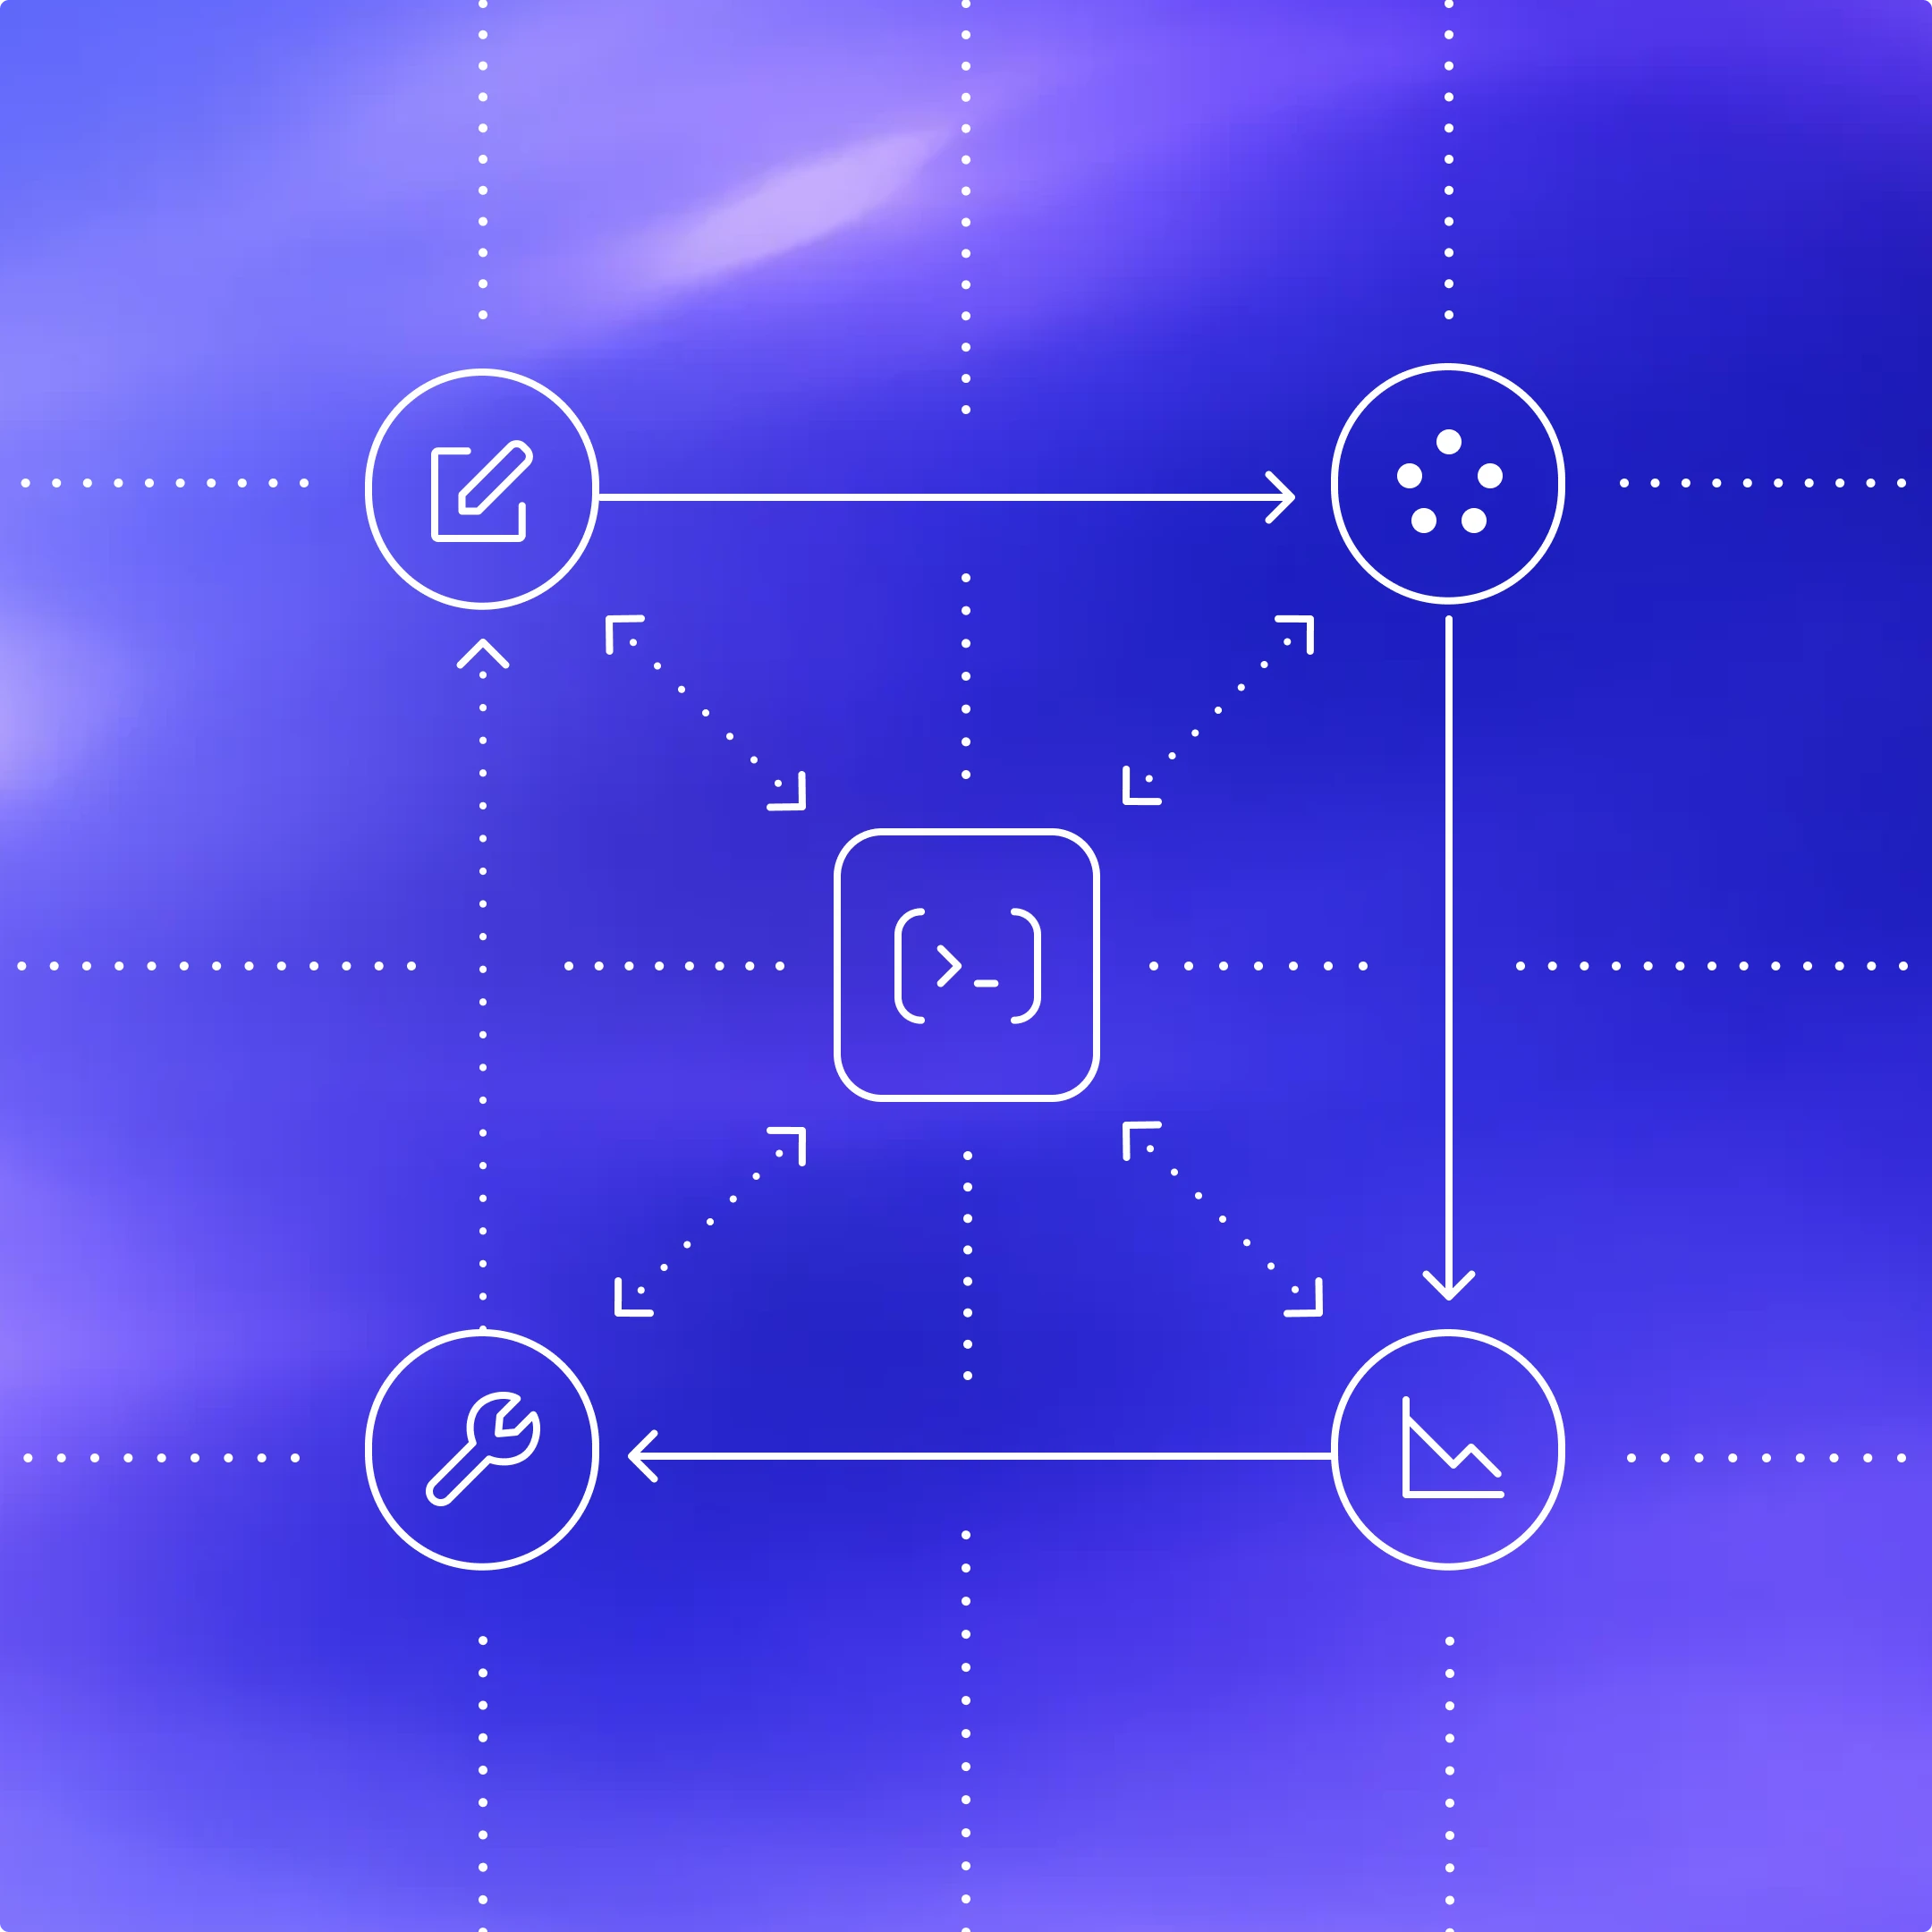
At the heart of every AI agent is something called “the agent loop.” A simplified illustration of the agent loop looks like this:

To start, the agent takes input from the user to include in the set of textual instructions it prepares for the model known as a prompt.
The next step is to query the model by sending it our instructions and asking it to generate a response, a process known as inference. During inference, the textual prompt is first translated into a sequence of input tokens(ਨਵੀਂ ਵਿੰਡੋ ਵਿੱਚ ਖੁੱਲ੍ਹਦਾ ਹੈ)—integers that index into the model’s vocabulary. These tokens are then used to sample the model, producing a new sequence of output tokens.
The output tokens are translated back into text, which becomes the model’s response. Because tokens are produced incrementally, this translation can happen as the model runs, which is why many LLM-based applications display streaming output. In practice, inference is usually encapsulated behind an API that operates on text, abstracting away the details of tokenization.
As the result of the inference step, the model either (1) produces a final response to the user’s original input, or (2) requests a tool call that the agent is expected to perform (e.g., “run ls and report the output”). In the case of (2), the agent executes the tool call and appends its output to the original prompt. This output is used to generate a new input that’s used to re-query the model; the agent can then take this new information into account and try again.
This process repeats until the model stops emitting tool calls and instead produces a message for the user (referred to as an assistant message in OpenAI models). In many cases, this message directly answers the user’s original request, but it may also be a follow-up question for the user.
Because the agent can execute tool calls that modify the local environment, its “output” is not limited to the assistant message. In many cases, the primary output of a software agent is the code it writes or edits on your machine. Nevertheless, each turn always ends with an assistant message—such as “I added the architecture.md you asked for”—which signals a termination state in the agent loop. From the agent’s perspective, its work is complete and control returns to the user.
The journey from user input to agent response shown in the diagram is referred to as one turn of a conversation (a thread in Codex). Though this conversation turn can include many iterations between the model inference and tool calls. Every time you send a new message to an existing conversation, the conversation history is included as part of the prompt for the new turn, which includes the messages and tool calls from previous turns:

This means that as the conversation grows, so does the length of the prompt used to sample the model. This length matters because every model has a context window, which is the maximum number of tokens it can use for one inference call. Note this window includes both input and output tokens. As you might imagine, an agent could decide to make hundreds of tool calls in a single turn, potentially exhausting the context window. For this reason, context window management is one of the agent’s many responsibilities. Now, let’s dive in to see how Codex runs the agent loop.
The Codex CLI sends HTTP requests to the Responses API(ਨਵੀਂ ਵਿੰਡੋ ਵਿੱਚ ਖੁੱਲ੍ਹਦਾ ਹੈ) to run model inference. We’ll examine how information flows through Codex, which uses the Responses API to drive the agent loop.
The Responses API endpoint that the Codex CLI uses is configurable(ਨਵੀਂ ਵਿੰਡੋ ਵਿੱਚ ਖੁੱਲ੍ਹਦਾ ਹੈ), so it can be used with any endpoint that implements the Responses API(ਨਵੀਂ ਵਿੰਡੋ ਵਿੱਚ ਖੁੱਲ੍ਹਦਾ ਹੈ):
- When using ChatGPT login(ਨਵੀਂ ਵਿੰਡੋ ਵਿੱਚ ਖੁੱਲ੍ਹਦਾ ਹੈ) with the Codex CLI, it uses
https://chatgpt.com/backend-api/codex/responsesas the endpoint - When using API-key authentication(ਨਵੀਂ ਵਿੰਡੋ ਵਿੱਚ ਖੁੱਲ੍ਹਦਾ ਹੈ) with OpenAI hosted models, it uses
https://api.openai.com/v1/responsesas the endpoint - When running Codex CLI with
--ossto use gpt-oss with ollama 0.13.4+(ਨਵੀਂ ਵਿੰਡੋ ਵਿੱਚ ਖੁੱਲ੍ਹਦਾ ਹੈ) or LM Studio 0.3.39+(ਨਵੀਂ ਵਿੰਡੋ ਵਿੱਚ ਖੁੱਲ੍ਹਦਾ ਹੈ), it defaults tohttp://localhost:11434/v1/responsesrunning locally on your computer - Codex CLI can be used with the Responses API hosted by a cloud provider such as Azure
Let’s explore how Codex creates the prompt for the first inference call in a conversation.
As an end user, you don’t specify the prompt used to sample the model verbatim when you query the Responses API. Instead, you specify various input types as part of your query, and the Responses API server decides how to structure this information into a prompt that the model is designed to consume. You can think of the prompt as a “list of items”; this section will explain how your query gets transformed into that list.
In the initial prompt, every item in the list is associated with a role. The role indicates how much weight the associated content should have and is one of the following values (in decreasing order of priority): system, developer, user, assistant.
The Responses API(ਨਵੀਂ ਵਿੰਡੋ ਵਿੱਚ ਖੁੱਲ੍ਹਦਾ ਹੈ) takes a JSON payload with many parameters. We’ll focus on these three:
instructions(ਨਵੀਂ ਵਿੰਡੋ ਵਿੱਚ ਖੁੱਲ੍ਹਦਾ ਹੈ): system (or developer) message inserted into the model’s contexttools(ਨਵੀਂ ਵਿੰਡੋ ਵਿੱਚ ਖੁੱਲ੍ਹਦਾ ਹੈ): a list of tools the model may call while generating a responseinput(ਨਵੀਂ ਵਿੰਡੋ ਵਿੱਚ ਖੁੱਲ੍ਹਦਾ ਹੈ): a list of text, image, or file inputs to the model
In Codex, the instructions field is read from the model_instructions_file(ਨਵੀਂ ਵਿੰਡੋ ਵਿੱਚ ਖੁੱਲ੍ਹਦਾ ਹੈ) in ~/.codex/config.toml, if specified; otherwise, the base_instructions associated with a model(ਨਵੀਂ ਵਿੰਡੋ ਵਿੱਚ ਖੁੱਲ੍ਹਦਾ ਹੈ) are used. Model-specific instructions live in the Codex repo and are bundled into the CLI (e.g., gpt-5.2-codex_prompt.md(ਨਵੀਂ ਵਿੰਡੋ ਵਿੱਚ ਖੁੱਲ੍ਹਦਾ ਹੈ)).
The tools field is a list of tool definitions that conform to a schema defined by the Responses API. For Codex, this includes tools that are provided by the Codex CLI, tools that are provided by the Responses API that should be made available to Codex, as well as tools provided by the user, usually via MCP servers:
Finally, the input field of the JSON payload is a list of items. Codex inserts the following items(ਨਵੀਂ ਵਿੰਡੋ ਵਿੱਚ ਖੁੱਲ੍ਹਦਾ ਹੈ) into the input before adding the user message:
1. A message with role=developer that describes the sandbox that applies only to the Codex-provided shell tool defined in the tools section. That is, other tools, such as those provided from MCP servers, are not sandboxed by Codex and are responsible for enforcing their own guardrails.
The message is built from a template where the key pieces of content come from snippets of Markdown bundled into the Codex CLI, such as workspace_write.md(ਨਵੀਂ ਵਿੰਡੋ ਵਿੱਚ ਖੁੱਲ੍ਹਦਾ ਹੈ) and on_request.md(ਨਵੀਂ ਵਿੰਡੋ ਵਿੱਚ ਖੁੱਲ੍ਹਦਾ ਹੈ):
2. (Optional) A message with role=developer whose contents are the developer_instructions value read from the user’s config.toml file.
3. (Optional) A message with role=user whose contents are the “user instructions,” which are not sourced from a single file but are aggregated across multiple sources(ਨਵੀਂ ਵਿੰਡੋ ਵਿੱਚ ਖੁੱਲ੍ਹਦਾ ਹੈ). In general, more specific instructions appear later:
- Contents of
AGENTS.override.mdandAGENTS.mdin$CODEX_HOME - Subject to a limit (32 KiB, by default), look in each folder from the Git/project root of the
cwd(if it it exists) up to thecwditself: add the contents of any ofAGENTS.override.md,AGENTS.md, or any filename specified byproject_doc_fallback_filenames in config.toml - If any skills(ਨਵੀਂ ਵਿੰਡੋ ਵਿੱਚ ਖੁੱਲ੍ਹਦਾ ਹੈ) have been configured:
- a short preamble about skills
- the skill metadata(ਨਵੀਂ ਵਿੰਡੋ ਵਿੱਚ ਖੁੱਲ੍ਹਦਾ ਹੈ) for each skill
- a section on how to use skills(ਨਵੀਂ ਵਿੰਡੋ ਵਿੱਚ ਖੁੱਲ੍ਹਦਾ ਹੈ)
4. A message with role=user that describes the local environment in which the agent is currently operating. This specifies the current working directory and the user’s shell(ਨਵੀਂ ਵਿੰਡੋ ਵਿੱਚ ਖੁੱਲ੍ਹਦਾ ਹੈ):
ਜਦੋਂ Codex input ਨੂੰ ਸ਼ੁਰੂ ਕਰਨ ਲਈ ਉੱਪਰ ਦਿੱਤੀ ਸਾਰੀ computation ਕਰ ਲੈਂਦਾ ਹੈ, ਤਾਂ ਇਹ ਗੱਲਬਾਤ ਸ਼ੁਰੂ ਕਰਨ ਲਈ ਯੂਜ਼ਰ ਸੁਨੇਹਾ ਜੋੜ ਦਿੰਦਾ ਹੈ.
ਪਿਛਲੀਆਂ ਉਦਾਹਰਨਾਂ ਹਰ message ਦੇ content ‘ਤੇ ਕੇਂਦ੍ਰਿਤ ਸਨ, ਪਰ ਧਿਆਨ ਦਿਓ ਕਿ input ਦਾ ਹਰ element type, role(ਨਵੀਂ ਵਿੰਡੋ ਵਿੱਚ ਖੁੱਲ੍ਹਦਾ ਹੈ), ਅਤੇ content ਵਾਲਾ ਇੱਕ JSON object ਹੁੰਦਾ ਹੈ, ਇਸ ਤਰ੍ਹਾਂ:
ਜਦੋਂ Codex Responses API ਨੂੰ ਭੇਜਣ ਲਈ ਪੂਰਾ JSON payload ਤਿਆਰ ਕਰ ਲੈਂਦਾ ਹੈ, ਫਿਰ ਇਹ ~/.codex/config.toml ਵਿੱਚ Responses API ਐਂਡਪੌਇੰਟ ਕਿਵੇਂ configure ਹੈ ਇਸ ‘ਤੇ ਨਿਰਭਰ ਕਰਦੇ ਹੋਏ Authorization header ਨਾਲ HTTP POST request ਕਰਦਾ ਹੈ (ਜੇ ਦਿੱਤੇ ਗਏ ਹੋਣ ਤਾਂ ਵਾਧੂ HTTP headers ਅਤੇ query parameters ਵੀ ਜੋੜੇ ਜਾਂਦੇ ਹਨ).
ਜਦੋਂ ਕੋਈ OpenAI Responses API server request ਪ੍ਰਾਪਤ ਕਰਦਾ ਹੈ, ਇਹ ਮਾਡਲ ਲਈ ਪ੍ਰੌੰਪਟ ਹੇਠਾਂ ਦਿੱਤੇ ਤਰੀਕੇ ਨਾਲ JSON ਤੋਂ ਨਿਕਾਲਦਾ ਹੈ (ਯਕੀਨੀ ਤੌਰ ‘ਤੇ, Responses API ਦਾ ਕੋਈ custom implementation ਵੱਖਰਾ ਫ਼ੈਸਲਾ ਕਰ ਸਕਦਾ ਹੈ):

ਜਿਵੇਂ ਤੁਸੀਂ ਦੇਖ ਸਕਦੇ ਹੋ, ਪ੍ਰੌੰਪਟ ਦੀਆਂ ਪਹਿਲੀਆਂ ਤਿੰਨ items ਦਾ ਕ੍ਰਮ client ਨਹੀਂ, server ਨਿਰਧਾਰਤ ਕਰਦਾ ਹੈ। ਫਿਰ ਵੀ, ਉਹਨਾਂ ਤਿੰਨ items ਵਿੱਚੋਂ ਸਿਰਫ਼ system message ਦਾ content ਹੀ server ਦੇ ਕੰਟਰੋਲ ਹੇਠ ਹੁੰਦਾ ਹੈ, ਕਿਉਂਕਿ tools ਅਤੇ instructions client ਦੁਆਰਾ ਨਿਰਧਾਰਤ ਕੀਤੇ ਜਾਂਦੇ ਹਨ। ਪ੍ਰੌੰਪਟ ਨੂੰ ਪੂਰਾ ਕਰਨ ਲਈ ਇਨ੍ਹਾਂ ਤੋਂ ਬਾਅਦ JSON payload ਤੋਂ input ਆਉਂਦਾ ਹੈ.
ਹੁਣ ਜਦੋਂ ਸਾਡੇ ਕੋਲ ਪ੍ਰੌੰਪਟ ਹੈ, ਅਸੀਂ ਮਾਡਲ ਤੋਂ sample ਲੈਣ ਲਈ ਤਿਆਰ ਹਾਂ.
Responses API ਲਈ ਇਹ HTTP request Codex ਵਿੱਚ ਗੱਲਬਾਤ ਦਾ ਪਹਿਲਾ “turn” ਸ਼ੁਰੂ ਕਰਦੀ ਹੈ। server Server-Sent Events (SSE(ਨਵੀਂ ਵਿੰਡੋ ਵਿੱਚ ਖੁੱਲ੍ਹਦਾ ਹੈ)) stream ਨਾਲ ਜਵਾਬ ਦਿੰਦਾ ਹੈ। ਹਰ event ਦਾ data ਇੱਕ JSON payload ਹੁੰਦਾ ਹੈ ਜਿਸਦਾ "type" "response" ਨਾਲ ਸ਼ੁਰੂ ਹੁੰਦਾ ਹੈ, ਜੋ ਕੁਝ ਇਸ ਤਰ੍ਹਾਂ ਹੋ ਸਕਦਾ ਹੈ (events ਦੀ ਪੂਰੀ ਸੂਚੀ ਸਾਡੇ API docs(ਨਵੀਂ ਵਿੰਡੋ ਵਿੱਚ ਖੁੱਲ੍ਹਦਾ ਹੈ) ਵਿੱਚ ਮਿਲ ਸਕਦੀ ਹੈ):
Codex events ਦੀ stream ਨੂੰ consume ਕਰਦਾ ਹੈ(ਨਵੀਂ ਵਿੰਡੋ ਵਿੱਚ ਖੁੱਲ੍ਹਦਾ ਹੈ) ਅਤੇ ਉਹਨਾਂ ਨੂੰ ਅੰਦਰੂਨੀ event objects ਵਜੋਂ ਮੁੜ publish ਕਰਦਾ ਹੈ ਜਿਨ੍ਹਾਂ ਨੂੰ client ਵਰਤ ਸਕਦਾ ਹੈ। response.output_text.delta ਵਰਗੇ events UI ਵਿੱਚ streaming ਨੂੰ support ਕਰਨ ਲਈ ਵਰਤੇ ਜਾਂਦੇ ਹਨ, ਜਦਕਿ response.output_item.added ਵਰਗੇ ਹੋਰ events ਉਹਨਾਂ objects ਵਿੱਚ ਬਦਲੇ ਜਾਂਦੇ ਹਨ ਜੋ ਅਗਲੀਆਂ Responses API calls ਲਈ input ਨਾਲ ਜੋੜੇ ਜਾਂਦੇ ਹਨ.
ਮੰਨ ਲਓ ਕਿ Responses API ਲਈ ਪਹਿਲੀ request ਵਿੱਚ ਦੋ response.output_item.done events ਸ਼ਾਮਲ ਹਨ: ਇੱਕ type=reasoning ਨਾਲ ਅਤੇ ਇੱਕ type=function_call ਨਾਲ। ਜਦੋਂ ਅਸੀਂ tool call ਦੇ response ਨਾਲ ਮਾਡਲ ਨੂੰ ਮੁੜ query ਕਰਦੇ ਹਾਂ, ਤਾਂ ਇਹ events JSON ਦੀ input field ਵਿੱਚ ਦਰਸਾਏ ਜਾਣੇ ਲਾਜ਼ਮੀ ਹਨ:
ਅਗਲੀ query ਦੇ ਹਿੱਸੇ ਵਜੋਂ ਮਾਡਲ ਤੋਂ sample ਲੈਣ ਲਈ ਵਰਤਿਆ ਜਾਣ ਵਾਲਾ ਪ੍ਰੌੰਪਟ ਕੁਝ ਇਸ ਤਰ੍ਹਾਂ ਦਿਖੇਗਾ:

ਖ਼ਾਸ ਤੌਰ ‘ਤੇ, ਧਿਆਨ ਦਿਓ ਕਿ ਪੁਰਾਣਾ ਪ੍ਰੌੰਪਟ ਨਵੇਂ ਪ੍ਰੌੰਪਟ ਦਾ ਬਿਲਕੁਲ prefix ਹੁੰਦਾ ਹੈ। ਇਹ ਜਾਨਬੁੱਝ ਕੇ ਕੀਤਾ ਗਿਆ ਹੈ, ਕਿਉਂਕਿ ਇਸ ਨਾਲ ਅਗਲੀਆਂ requests ਕਾਫ਼ੀ ਜ਼ਿਆਦਾ ਕੁਸ਼ਲ ਹੋ ਜਾਂਦੀਆਂ ਹਨ ਕਿਉਂਕਿ ਇਹ ਸਾਨੂੰ prompt caching ਦਾ ਫ਼ਾਇਦਾ ਲੈਣ ਦੇ ਯੋਗ ਬਣਾਉਂਦਾ ਹੈ (ਜਿਸ ਦੀ ਚਰਚਾ ਅਸੀਂ ਅਗਲੇ performance ਸੈਕਸ਼ਨ ਵਿੱਚ ਕਰਾਂਗੇ).
ਏਜੰਟ ਲੂਪ ਦੇ ਸਾਡੇ ਪਹਿਲੇ ਡਾਇਗ੍ਰਾਮ ਵੱਲ ਮੁੜ ਵੇਖਣ ‘ਤੇ, ਅਸੀਂ ਦੇਖਦੇ ਹਾਂ ਕਿ inference ਅਤੇ tool calling ਦੇ ਵਿਚਕਾਰ ਕਈ iteration ਹੋ ਸਕਦੀਆਂ ਹਨ। ਪ੍ਰੌੰਪਟ ਵਧਦਾ ਜਾ ਸਕਦਾ ਹੈ ਜਦ ਤੱਕ ਅਸੀਂ ਅਖੀਰਕਾਰ assistant message ਪ੍ਰਾਪਤ ਨਹੀਂ ਕਰਦੇ, ਜੋ turn ਦੇ ਅੰਤ ਦਾ ਸੰਕੇਤ ਹੁੰਦਾ ਹੈ:
Codex CLI ਵਿੱਚ, ਅਸੀਂ assistant message ਯੂਜ਼ਰ ਨੂੰ ਦਿਖਾਉਂਦੇ ਹਾਂ ਅਤੇ composer ‘ਤੇ focus ਕਰਦੇ ਹਾਂ ਤਾਂ ਜੋ ਯੂਜ਼ਰ ਨੂੰ ਦਰਸਾਇਆ ਜਾ ਸਕੇ ਕਿ ਗੱਲਬਾਤ ਜਾਰੀ ਰੱਖਣ ਲਈ ਹੁਣ ਉਹਨਾਂ ਦਾ “turn” ਹੈ। ਜੇ ਯੂਜ਼ਰ ਜਵਾਬ ਦਿੰਦਾ ਹੈ, ਤਾਂ ਪਿਛਲੇ turn ਦਾ assistant message ਅਤੇ ਯੂਜ਼ਰ ਦਾ ਨਵਾਂ ਸੁਨੇਹਾ ਦੋਵੇਂ ਨਵੇਂ turn ਨੂੰ ਸ਼ੁਰੂ ਕਰਨ ਲਈ Responses API request ਦੇ input ਨਾਲ ਜੋੜੇ ਜਾਣੇ ਚਾਹੀਦੇ ਹਨ:
ਇੱਕ ਵਾਰ ਫਿਰ, ਕਿਉਂਕਿ ਅਸੀਂ ਗੱਲਬਾਤ ਜਾਰੀ ਰੱਖ ਰਹੇ ਹਾਂ, ਇਸ ਲਈ Responses API ਨੂੰ ਭੇਜੇ ਜਾਣ ਵਾਲੇ input ਦੀ ਲੰਬਾਈ ਵਧਦੀ ਰਹਿੰਦੀ ਹੈ:

ਆਓ ਵੇਖੀਏ ਕਿ ਇਹ ਲਗਾਤਾਰ ਵਧਦਾ ਪ੍ਰੌੰਪਟ performance ਲਈ ਕੀ ਮਤਲਬ ਰੱਖਦਾ ਹੈ.
ਤੁਸੀਂ ਆਪਣੇ ਆਪ ਨੂੰ ਪੁੱਛ ਰਹੇ ਹੋ ਸਕਦੇ ਹੋ, “ਰੁਕੋ, ਕੀ ਗੱਲਬਾਤ ਦੇ ਦੌਰਾਨ Responses API ਨੂੰ ਭੇਜੇ ਗਏ JSON ਦੀ ਮਾਤਰਾ ਦੇ ਹਿਸਾਬ ਨਾਲ ਏਜੰਟ ਲੂਪ quadratic ਨਹੀਂ ਹੁੰਦਾ?” ਅਤੇ ਤੁਸੀਂ ਸਹੀ ਹੋਵੋਗੇ। ਹਾਲਾਂਕਿ Responses API ਇਸ ਸਮੱਸਿਆ ਨੂੰ ਘਟਾਉਣ ਲਈ ਇੱਕ ਵਿਕਲਪਿਕ previous_response_id(ਨਵੀਂ ਵਿੰਡੋ ਵਿੱਚ ਖੁੱਲ੍ਹਦਾ ਹੈ) parameter ਨੂੰ support ਕਰਦੀ ਹੈ, Codex ਅੱਜ ਇਸਦੀ ਵਰਤੋਂ ਨਹੀਂ ਕਰਦਾ, ਮੁੱਖ ਤੌਰ ‘ਤੇ requests ਨੂੰ ਪੂਰੀ ਤਰ੍ਹਾਂ stateless ਰੱਖਣ ਅਤੇ Zero Data Retention (ZDR) configurations ਨੂੰ support ਕਰਨ ਲਈ.
previous_response_id ਤੋਂ ਬਚਣਾ Responses API ਦੇ provider ਲਈ ਚੀਜ਼ਾਂ ਸਧਾਰਨ ਕਰਦਾ ਹੈ ਕਿਉਂਕਿ ਇਹ ਯਕੀਨੀ ਬਣਾਂਦਾ ਹੈ ਕਿ ਹਰ request stateless ਹੋਵੇ। ਇਹ ਉਹਨਾਂ ਗਾਹਕਾਂ ਨੂੰ support ਕਰਨਾ ਵੀ ਸੌਖਾ ਬਣਾ ਦਿੰਦਾ ਹੈ ਜਿਨ੍ਹਾਂ ਨੇ Zero Data Retention (ZDR)(ਨਵੀਂ ਵਿੰਡੋ ਵਿੱਚ ਖੁੱਲ੍ਹਦਾ ਹੈ) ਚੁਣਿਆ ਹੈ, ਕਿਉਂਕਿ previous_response_id ਨੂੰ support ਕਰਨ ਲਈ ਲੋੜੀਂਦਾ data ਸੰਭਾਲਣਾ ZDR ਦੇ ਉਲਟ ਹੁੰਦਾ। ਧਿਆਨ ਦਿਓ ਕਿ ZDR ਗਾਹਕ ਪਿਛਲੇ turns ਤੋਂ proprietary reasoning messages ਦੇ ਲਾਭ ਤੋਂ ਵਾਂਝੇ ਨਹੀਂ ਰਹਿੰਦੇ, ਕਿਉਂਕਿ ਸੰਬੰਧਿਤ encrypted_content ਨੂੰ server ‘ਤੇ decrypt ਕੀਤਾ ਜਾ ਸਕਦਾ ਹੈ। (OpenAI ZDR ਗਾਹਕ ਦੀ decryption key ਸੰਭਾਲਦਾ ਹੈ, ਪਰ ਉਹਨਾਂ ਦਾ data ਨਹੀਂ।) ZDR ਨੂੰ support ਕਰਨ ਲਈ Codex ਵਿੱਚ ਕੀਤੀਆਂ ਸੰਬੰਧਿਤ ਤਬਦੀਲੀਆਂ ਲਈ PRs #642(ਨਵੀਂ ਵਿੰਡੋ ਵਿੱਚ ਖੁੱਲ੍ਹਦਾ ਹੈ) ਅਤੇ #1641(ਨਵੀਂ ਵਿੰਡੋ ਵਿੱਚ ਖੁੱਲ੍ਹਦਾ ਹੈ) ਵੇਖੋ.
ਆਮ ਤੌਰ ‘ਤੇ, ਮਾਡਲ ਤੋਂ sample ਲੈਣ ਦੀ ਲਾਗਤ network traffic ਦੀ ਲਾਗਤ ‘ਤੇ ਹਾਵੀ ਹੁੰਦੀ ਹੈ, ਜਿਸ ਨਾਲ sampling ਸਾਡੀਆਂ efficiency ਕੋਸ਼ਿਸ਼ਾਂ ਦਾ ਮੁੱਖ ਨਿਸ਼ਾਨਾ ਬਣਦੀ ਹੈ। ਇਸੇ ਲਈ prompt caching ਇੰਨੀ ਮਹੱਤਵਪੂਰਨ ਹੈ, ਕਿਉਂਕਿ ਇਹ ਸਾਨੂੰ ਪਿਛਲੇ inference call ਦੀ computation ਨੂੰ ਮੁੜ ਵਰਤਣ ਦੇ ਯੋਗ ਬਣਾਉਂਦੀ ਹੈ। ਜਦੋਂ ਸਾਨੂੰ cache hits ਮਿਲਦੇ ਹਨ, ਮਾਡਲ sampling quadratic ਦੀ ਬਜਾਇ linear ਹੁੰਦੀ ਹੈ। ਸਾਡੀ prompt caching (ਨਵੀਂ ਵਿੰਡੋ ਵਿੱਚ ਖੁੱਲ੍ਹਦਾ ਹੈ) documentation ਇਸਨੂੰ ਹੋਰ ਵਿਸਥਾਰ ਨਾਲ ਸਮਝਾਉਂਦੀ ਹੈ:
Cache hits ਸਿਰਫ਼ ਪ੍ਰੌੰਪਟ ਦੇ ਅੰਦਰ exact prefix matches ਲਈ ਹੀ ਸੰਭਵ ਹਨ। caching ਦੇ ਲਾਭ ਲੈਣ ਲਈ, instructions ਅਤੇ examples ਵਰਗਾ static content ਆਪਣੇ ਪ੍ਰੌੰਪਟ ਦੇ ਸ਼ੁਰੂ ਵਿੱਚ ਰੱਖੋ, ਅਤੇ variable content, ਜਿਵੇਂ user-specific information, ਅੰਤ ਵਿੱਚ ਰੱਖੋ। ਇਹ images ਅਤੇ tools ‘ਤੇ ਵੀ ਲਾਗੂ ਹੁੰਦਾ ਹੈ, ਜਿਨ੍ਹਾਂ ਦਾ requests ਦੇ ਵਿਚਕਾਰ ਇਕੋ ਜਿਹਾ ਹੋਣਾ ਲਾਜ਼ਮੀ ਹੈ.
ਇਸ ਨੂੰ ਧਿਆਨ ਵਿੱਚ ਰੱਖਦਿਆਂ, ਆਓ ਵਿਚਾਰ ਕਰੀਏ ਕਿ Codex ਵਿੱਚ ਕਿਹੜੀਆਂ operations “cache miss” ਦਾ ਕਾਰਣ ਬਣ ਸਕਦੀਆਂ ਹਨ:
- ਗੱਲਬਾਤ ਦੇ ਵਿਚਕਾਰ ਮਾਡਲ ਲਈ ਉਪਲਬਧ
toolsਨੂੰ ਬਦਲਣਾ. - Responses API request ਦੇ ਟਾਰਗੇਟ
modelਨੂੰ ਬਦਲਣਾ (ਅਮਲ ਵਿੱਚ, ਇਹ ਮੂਲ ਪ੍ਰੌੰਪਟ ਦੀ ਤੀਜੀ item ਨੂੰ ਬਦਲਦਾ ਹੈ, ਕਿਉਂਕਿ ਉਸ ਵਿੱਚ ਮਾਡਲ-ਖ਼ਾਸ instructions ਹੁੰਦੀਆਂ ਹਨ). - sandbox configuration, approval mode, ਜਾਂ current working directory ਨੂੰ ਬਦਲਣਾ.
Codex CLI ਵਿੱਚ ਨਵੀਆਂ features ਲਿਆਉਂਦੇ ਸਮੇਂ, ਜੋ prompt caching ਨਾਲ ਸਮਝੌਤਾ ਕਰ ਸਕਦੀਆਂ ਹਨ, Codex ਟੀਮ ਨੂੰ ਬਹੁਤ ਸਾਵਧਾਨ ਰਹਿਣਾ ਪੈਂਦਾ ਹੈ। ਉਦਾਹਰਨ ਵਜੋਂ, MCP tools ਲਈ ਸਾਡੇ ਸ਼ੁਰੂਆਤੀ support ਨੇ ਇੱਕ bug ਪੈਦਾ ਕੀਤਾ ਜਿੱਥੇ ਅਸੀਂ tools ਨੂੰ ਸਥਿਰ ਕ੍ਰਮ ਵਿੱਚ enumerate ਕਰਨ ਵਿੱਚ ਅਸਫਲ ਰਹੇ(ਨਵੀਂ ਵਿੰਡੋ ਵਿੱਚ ਖੁੱਲ੍ਹਦਾ ਹੈ), ਜਿਸ ਨਾਲ cache misses ਹੋਈਆਂ। ਧਿਆਨ ਦਿਓ ਕਿ MCP tools ਖ਼ਾਸ ਤੌਰ ‘ਤੇ ਔਖੇ ਹੋ ਸਕਦੇ ਹਨ ਕਿਉਂਕਿ MCP servers notifications/tools/list_changed(ਨਵੀਂ ਵਿੰਡੋ ਵਿੱਚ ਖੁੱਲ੍ਹਦਾ ਹੈ) notification ਰਾਹੀਂ ਆਪਣੀ tools ਸੂਚੀ ਨੂੰ ਤੁਰੰਤ ਬਦਲ ਸਕਦੇ ਹਨ। ਲੰਬੀ ਗੱਲਬਾਤ ਦੇ ਵਿਚਕਾਰ ਇਸ notification ਦਾ ਪਾਲਣ ਕਰਨ ਨਾਲ ਮਹਿੰਗੀ cache miss ਹੋ ਸਕਦੀ ਹੈ.
ਜਿੱਥੇ ਸੰਭਵ ਹੋਵੇ, ਅਸੀਂ ਗੱਲਬਾਤ ਦੇ ਵਿਚਕਾਰ ਹੋਣ ਵਾਲੇ configuration changes ਨੂੰ ਪਹਿਲਾਂ ਦੇ message ਨੂੰ ਸੋਧਣ ਦੀ ਬਜਾਇ input ਨਾਲ ਇੱਕ ਨਵਾਂ message ਜੋੜ ਕੇ ਸੰਭਾਲਦੇ ਹਾਂ:
- ਜੇ sandbox configuration ਜਾਂ approval mode ਬਦਲਦੀ ਹੈ, ਤਾਂ ਅਸੀਂ insert(ਨਵੀਂ ਵਿੰਡੋ ਵਿੱਚ ਖੁੱਲ੍ਹਦਾ ਹੈ) ਕਰਦੇ ਹਾਂ ਇੱਕ ਨਵਾਂ
role=developermessage, ਜਿਸਦਾ format ਮੂਲ<permissions instructions>item ਵਰਗਾ ਹੀ ਹੁੰਦਾ ਹੈ. - ਜੇ current working directory ਬਦਲਦੀ ਹੈ, ਤਾਂ ਅਸੀਂ insert(ਨਵੀਂ ਵਿੰਡੋ ਵਿੱਚ ਖੁੱਲ੍ਹਦਾ ਹੈ) ਕਰਦੇ ਹਾਂ ਇੱਕ ਨਵਾਂ
role=usermessage, ਜਿਸਦਾ format ਮੂਲ<environment_context>ਵਰਗਾ ਹੀ ਹੁੰਦਾ ਹੈ.
ਅਸੀਂ performance ਲਈ cache hits ਯਕੀਨੀ ਬਣਾਉਣ ਵਾਸਤੇ ਬੇਹੱਦ ਯਤਨ ਕਰਦੇ ਹਾਂ। ਇੱਕ ਹੋਰ ਮੁੱਖ ਸਰੋਤ ਵੀ ਹੈ ਜਿਸਨੂੰ ਸਾਨੂੰ manage ਕਰਨਾ ਪੈਂਦਾ ਹੈ: context window.
context window ਖਤਮ ਹੋਣ ਤੋਂ ਬਚਣ ਲਈ ਸਾਡੀ ਆਮ ਰਣਨੀਤੀ ਇਹ ਹੈ ਕਿ ਜਦੋਂ ਟੋਕਨਾਂ ਦੀ ਗਿਣਤੀ ਕਿਸੇ threshold ਤੋਂ ਵੱਧ ਜਾਵੇ ਤਾਂ ਗੱਲਬਾਤ ਨੂੰ compact ਕਰ ਦਿੱਤਾ ਜਾਵੇ। ਖ਼ਾਸ ਤੌਰ ‘ਤੇ, ਅਸੀਂ input ਨੂੰ items ਦੀ ਇੱਕ ਨਵੀਂ, ਛੋਟੀ ਸੂਚੀ ਨਾਲ ਬਦਲ ਦਿੰਦੇ ਹਾਂ ਜੋ ਗੱਲਬਾਤ ਦੀ ਨੁਮਾਇੰਦਗੀ ਕਰਦੀ ਹੈ, ਜਿਸ ਨਾਲ ਏਜੰਟ ਹੁਣ ਤੱਕ ਹੋਈਆਂ ਘਟਨਾਵਾਂ ਦੀ ਸਮਝ ਨਾਲ ਅੱਗੇ ਵੱਧ ਸਕਦਾ ਹੈ। ਯੂਜ਼ਰ ਤੋਂ custom summarization ਜਾਂ state-carrying systems ਬਣਾਉਣ ਅਤੇ ਸੰਭਾਲਣ ਦੀ ਮੰਗ ਕਰਨ ਦੀ ਬਜਾਇ, ਅਸੀਂ Responses API ਵਿੱਚ native compaction ਜੋੜੀ, ਜੋ ਇਸ ਤਰ੍ਹਾਂ ਬਣਾਈ ਗਈ ਕਿ ਇਹ ਮਾਡਲ ਦੇ ਵਿਹਾਰ ਅਤੇ ਇਸਦੀ training ਨਾਲ ਮੇਲ ਖਾਂਦੀ ਹੋਵੇ। ਇੱਕ ਸ਼ੁਰੂਆਤੀ compaction implementation(ਨਵੀਂ ਵਿੰਡੋ ਵਿੱਚ ਖੁੱਲ੍ਹਦਾ ਹੈ) ਵਿੱਚ ਯੂਜ਼ਰ ਨੂੰ ਹੱਥੋਂ /compact command ਚਲਾਉਣੀ ਪੈਂਦੀ ਸੀ, ਜੋ ਮੌਜੂਦਾ conversation ਅਤੇ summarization(ਨਵੀਂ ਵਿੰਡੋ ਵਿੱਚ ਖੁੱਲ੍ਹਦਾ ਹੈ) ਲਈ custom instructions ਦੀ ਵਰਤੋਂ ਕਰਕੇ Responses API ਨੂੰ query ਕਰਦੀ ਸੀ। Codex resulting assistant message, ਜਿਸ ਵਿੱਚ summary ਹੁੰਦੀ ਸੀ, ਨੂੰ ਅਗਲੇ conversation turns ਲਈ ਨਵੇਂ input ਵਜੋਂ(ਨਵੀਂ ਵਿੰਡੋ ਵਿੱਚ ਖੁੱਲ੍ਹਦਾ ਹੈ) ਵਰਤਦਾ ਸੀ.
ਉਦੋਂ ਤੋਂ, Responses API ਇੱਕ ਖ਼ਾਸ /responses/compact endpoint(ਨਵੀਂ ਵਿੰਡੋ ਵਿੱਚ ਖੁੱਲ੍ਹਦਾ ਹੈ) ਨੂੰ support ਕਰਨ ਲਈ ਵਿਕਸਿਤ ਹੋ ਗਈ ਹੈ, ਜੋ compaction ਹੋਰ ਕੁਸ਼ਲਤਾ ਨਾਲ ਕਰਦੀ ਹੈ। ਇਹ items ਦੀ ਇੱਕ ਸੂਚੀ(ਨਵੀਂ ਵਿੰਡੋ ਵਿੱਚ ਖੁੱਲ੍ਹਦਾ ਹੈ) ਵਾਪਸ ਕਰਦੀ ਹੈ ਜਿਸਨੂੰ ਪਿਛਲੇ input ਦੀ ਥਾਂ ਗੱਲਬਾਤ ਜਾਰੀ ਰੱਖਣ ਅਤੇ context window ਨੂੰ ਖਾਲੀ ਕਰਨ ਲਈ ਵਰਤਿਆ ਜਾ ਸਕਦਾ ਹੈ। ਇਸ ਸੂਚੀ ਵਿੱਚ ਇੱਕ ਖ਼ਾਸ type=compaction item ਸ਼ਾਮਲ ਹੁੰਦੀ ਹੈ ਜਿਸ ਵਿੱਚ ਇੱਕ opaque encrypted_content item ਹੁੰਦੀ ਹੈ ਜੋ ਮਾਡਲ ਦੀ ਮੂਲ ਗੱਲਬਾਤ ਬਾਰੇ latent understanding ਨੂੰ ਸੰਭਾਲਦੀ ਹੈ। ਹੁਣ, Codex ਗੱਲਬਾਤ ਨੂੰ compact ਕਰਨ ਲਈ ਇਸ ਐਂਡਪੌਇੰਟ ਦੀ ਆਪੇ ਵਰਤੋਂ ਕਰਦਾ ਹੈ ਜਦੋਂ auto_compact_limit(ਨਵੀਂ ਵਿੰਡੋ ਵਿੱਚ ਖੁੱਲ੍ਹਦਾ ਹੈ) ਪਾਰ ਹੋ ਜਾਂਦੀ ਹੈ.
ਅਸੀਂ Codex ਏਜੰਟ ਲੂਪ ਨਾਲ ਜਾਣ-ਪਛਾਣ ਕਰਵਾਈ ਹੈ ਅਤੇ ਸਮਝਾਇਆ ਹੈ ਕਿ ਜਦੋਂ Codex ਮਾਡਲ ਨੂੰ query ਕਰਦਾ ਹੈ ਤਾਂ ਇਹ ਆਪਣਾ context ਕਿਵੇਂ ਤਿਆਰ ਅਤੇ manage ਕਰਦਾ ਹੈ। ਇਸ ਦੌਰਾਨ, ਅਸੀਂ ਉਹ ਵਿਹਾਰਕ ਗੱਲਾਂ ਅਤੇ best practices ਉਜਾਗਰ ਕੀਤੀਆਂ ਜੋ Responses API ਦੇ ਉੱਪਰ ਏਜੰਟ ਲੂਪ ਬਣਾਉਣ ਵਾਲੇ ਹਰ ਵਿਅਕਤੀ ‘ਤੇ ਲਾਗੂ ਹੁੰਦੀਆਂ ਹਨ.
ਹਾਲਾਂਕਿ ਏਜੰਟ ਲੂਪ Codex ਦੀ ਬੁਨਿਆਦ ਦਿੰਦਾ ਹੈ, ਇਹ ਸਿਰਫ਼ ਸ਼ੁਰੂਆਤ ਹੈ। ਆਉਣ ਵਾਲੀਆਂ ਪੋਸਟਾਂ ਵਿੱਚ, ਅਸੀਂ CLI ਦੀ architecture ਵਿੱਚ ਡੂੰਘਾਈ ਨਾਲ ਜਾਵਾਂਗੇ, ਵੇਖਾਂਗੇ ਕਿ tool use ਕਿਵੇਂ implement ਕੀਤਾ ਜਾਂਦਾ ਹੈ, ਅਤੇ Codex ਦੇ sandboxing ਮਾਡਲ ਨੂੰ ਹੋਰ ਨੇੜੇ ਤੋਂ ਸਮਝਾਂਗੇ.